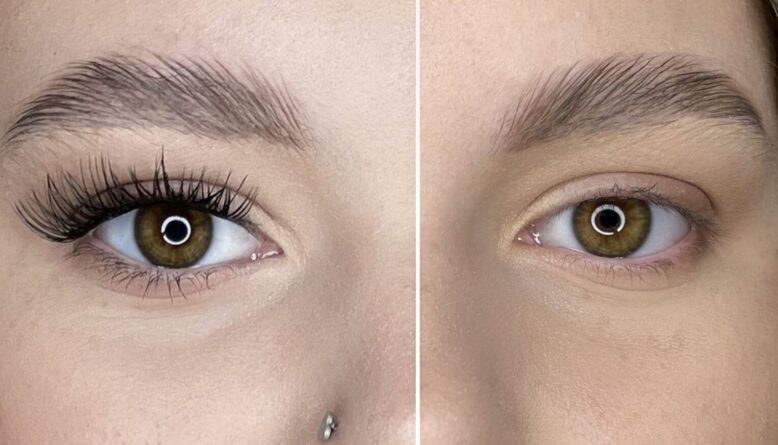
If, like me, you wish to achieve long, voluminous, and fluttery lashes from the moment you wake up, lash extensions are one of the ultimate ways to do it. Recently, I have discovered DIY lash extensions: an at-home solution that uses a permanent adhesive to attach false cluster lashes, so they can last for days if applied properly. As a beauty blogger, I was shocked that I didn’t know DIY lash extensions for home use existed until recently, but I decided to try them out myself and I loved them.
DIY lash extensions – what makes them special?
There are several reasons you might try DIY lash extensions instead of false lashes or a professional application, ranging from personal preference to convenience to cost. A few of the main benefits include the fact they are a low-cost alternative to professional eyelash extensions. They also provide long and defined lashes without the need to wear as much makeup.
Salon eyelash extensions can be costly and require a lot of upkeep, plus they can take as long as two hours to apply. Meanwhile, you can apply DIY eyelash extensions at home, with all necessary products available provided you get yourself the right cluster lash kit. Here is my personal ranking of 5 best lash extension kits from popular brands. While creating the ranking I considered the number of cluster lashes you get in the kit, the included products and accessories, and their quality and craftsmanship.
DIY eyelash extension kits – my personal ranking
1. Nanolash DIY Eyelash Extensions Starter Kit
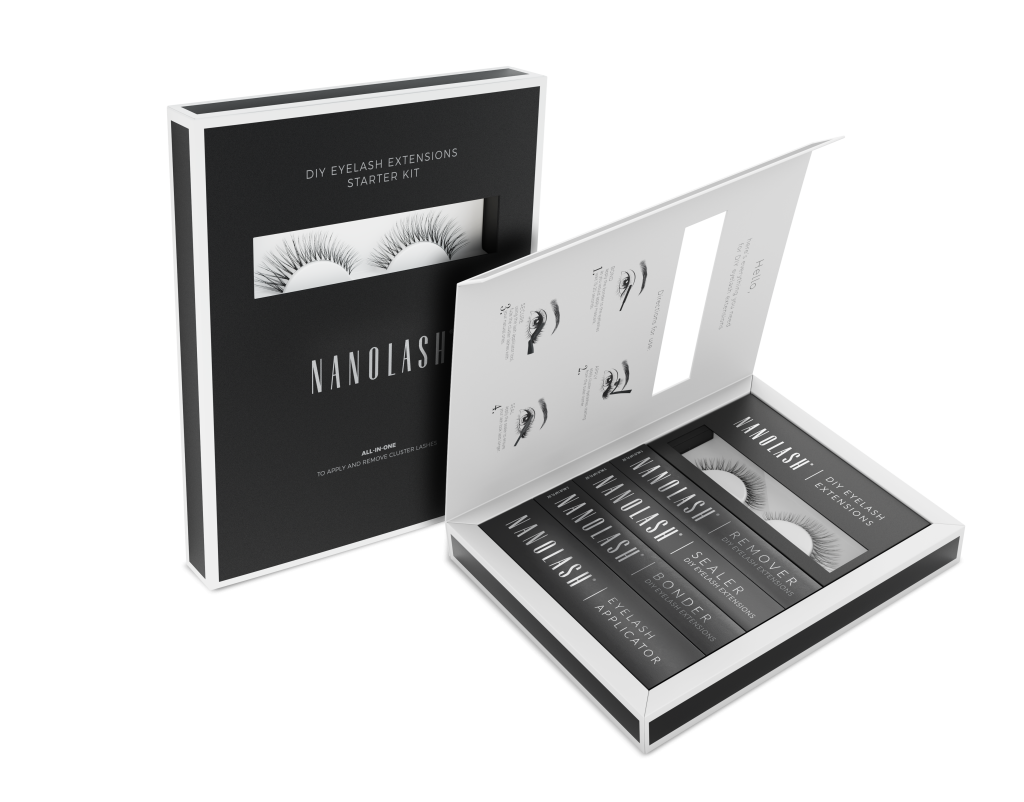
This do-it-yourself lash extensions starter kit includes everything you need for applying DIY cluster lashes at home. The kit contains 36 cluster lashes in three lengths: 10, 12, and 14 mm. In addition, there are three more products inside: a bonder, a sealer, and a remover, each with a capacity of 5 ml. There is also an applicator included.
All the elements of the kit are neatly organized and clearly labeled, which makes using the kit much easier, especially if you’re applying DIY cluster lashes for the first time.
The lash clusters from Nanolash are extremely soft and look very natural on the eyes. It takes just 10 minutes to apply the lashes, thanks to the comfortable-to-use applicator. It really is a quick and easy lash extension method. The starter kit is enough for about 4 full applications, making it a very economical solution.
The Nanolash DIY Eyelash Extensions Starter Kit provides cluster lashes in 8 different styles like the subtle INNOCENT or the more striking HEARTBREAKER, allowing you to match your lash look to your needs. I was surprised to discover that the lashes really lasted 7 days on my eyes, proving their quality and durability are outstanding. I believe this might be the perfect lash extension kit for beginners.
2. Lashify Starter Kit
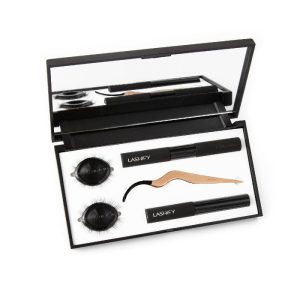
This is the most expensive lash extension kit I tested and probably the priciest kit of this kind on the market. The Lashify system was also specifically designed for sensitive eyes. Lashify’s formulas are ophthalmologist-tested, hypoallergenic and free of irritants, such as formaldehydes, cyanoacrylates and latex.
The Lashify cluster lashes are made of pure Korean silk, and they are in fact lightweight and feathery, so they don’t put stress on your natural lashes. And since they’re applied a couple millimeters away from your waterline, they give space for your natural lashes to breathe and grow.
However, the case contains just 10 lash clusters, enough for a single application. Even though the lashes are truly stunning and there are many styles to choose from, I would recommend this kit only to those with unlimited budget.
3. KISS Falscara Starter Kit
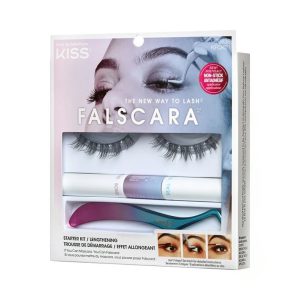
The starter kit contains: the Falscara Bond and Seal, a set of angled tweezers and a set of 10mm-12mm lash clusters. The cluster lashes from this kit are comfortable to wear, natural-looking and most importantly, a fraction of the price of real lash extensions.
However, this DIY lash kit comes with some drawbacks too. To ensure your lash look is durable, you need to protect them overnight with a special product that’s not included in the starter kit.
I feel like Falscara has been the perfect solution for someone like me who loves the idea of lash extensions, but not the time and effort of actually getting them done and of course the cost. I do wish there were more lash styles available and that the kit would include the overnight lash protector which would save me the extra expense.
4. Tatti Lashes Invisi-Lash Kit
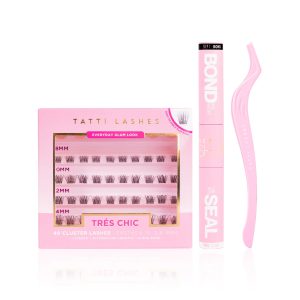
In the case of this lash kit, each pack of the individual clusters creates 4-8 lash looks (depending on how many clusters are applied) and can be re-used multiple times as long as they are cared for correctly.
There are 7 individual cluster styles to choose from. I chose the Brown cappuccino lash style and it proved to be a great choice since the lashes looked so natural people kept asking if they were mine!
First time I put these false lashes on, I was surprised at how easy they were to apply. They also looked very natural and they saved me loads of time in the morning as I didn’t need to do my makeup before work.
However, the kit does not include a remover and I wish there was something to remove the glue when removing the cluster lashes… it took me hours to pick off the glue residues.
Moreover, after one day of wear, my eyes felt dry and uncomfortable so I decided to remove the lashes at that point.
5. Glamnetic Lash Extension Kit
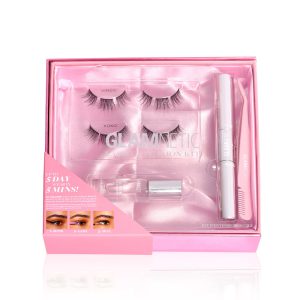
The Glamnetic kit comes with all the tools you need to enhance your eyes in 3 easy steps – they include Bond, Seal, and lash clusters. I think this kit is a bit similar to Falscara but this one is a bit cheaper. If you’re a beginner and worried about wasting money, I would suggest starting with this kit.
Unlike the kit from the Kiss brand, this one comes with a remover which is super helpful while removing the false cluster lashes. The lashes themselves are quite nice but you must be careful while removing them from the case as they are very fragile and break easily. When applied correctly, you can hardly notice that they’re on compared to strip lashes. They are, however, more noticeable than lash extensions.
As a fan of a natural look, I wasn’t very impressed with the finished look but maybe if I had chosen a different lash style, I would be more happy with the effect I achieved. The lashes lasted for 5 days and they were comfortable to wear, so overall, that’s a pretty good result.
Best DIY lash extension kit – my verdict
I have to admit, thanks to DIY cluster lash extensions, my lashes have never looked better. The kit I liked the most was the Nanolash DIY Eyelash Extensions Starter Kit as it allowed me to finally achieve my perfect no-makeup look.
After trying the Nanolash kit for one week, I threw away all my old strip lashes and tubes of glue. Applying these cluster lashes was so easy, and the results were absolutely stunning.
But most importantly, these lash extensions didn’t irritate my eyes or damage my natural lashes. In fact, they felt very comfortable.
Hands down, Nanolash provided me with the best experience I’ve had so far on my lash-enhancing journey. If you’re looking for high-quality lashes and a quick and easy application process, I’m sure you’d be satisfied with them too.


Leave a Reply