I have naturally thin, barely noticeable eyelashes. I didn’t want permanent lash extensions to avoid making them even weaker. Then cluster lashes – DIY Lash Extensions – caught my eye. They were supposed to guarantee easy application of cluster lash extensions at home. On top of that, we’re promised we can wear them for 5 days. I had to see if any of this was true!
DIY eyelash extension seemed to be a good option. It shouldn’t make my lashes worse because it’s not permanent, plus I was eager to try the cluster lashes because applying them takes only 10 minutes. Okay, that’s the promise the brand makes…
DIY Lash Extensions – what does the official website say about these lash clusters?
I bought my DIY Lash Extensions directly from the manufacturer. I know the cosmetic market is filled with knockoffs and I wanted to be sure of getting the genuine product.
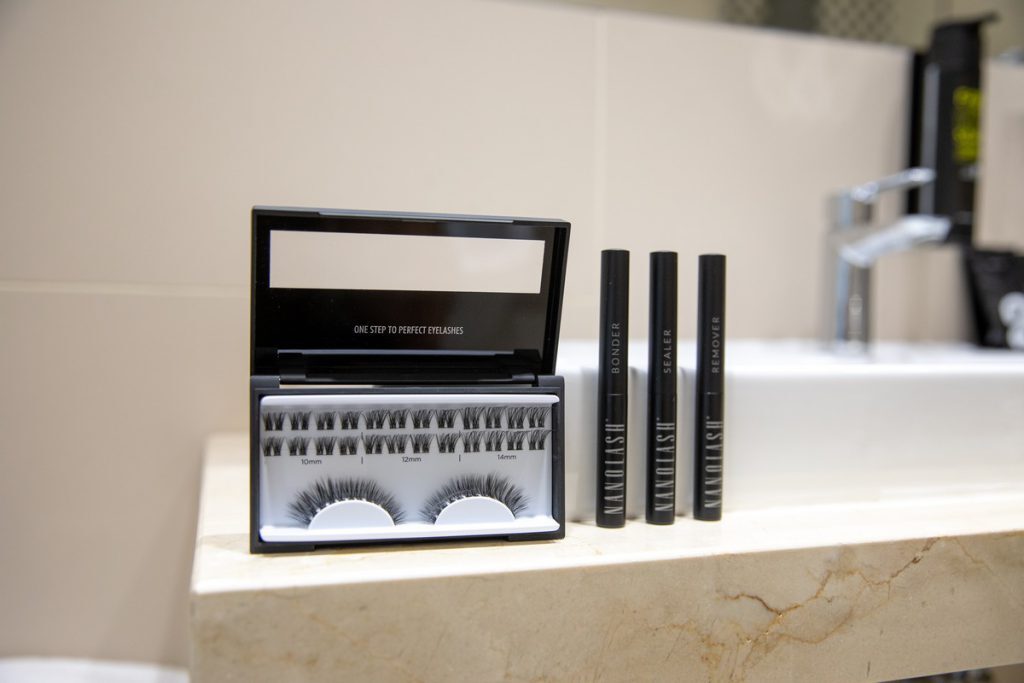
I found a few options on the website. The single packaging with lash clusters caught my eye right off. It includes 36 DIY lash clusters for use at home. They come in:
- 3 sizes: 10, 12 and 14 mm.
- 8 styles: you can mix and match them as you like.
The Nanolash online store also offers a DIY cluster lashes kit including:
- Nanolash bonder – simply put, it’s a lash glue for cluster lashes that gains full stickiness after 30 to 60 seconds.
- Nanolash remover – it’s made for removing cluster lashes without damaging natural lashes.
- Nanolash sealer – using it, we can get rid of the sticky coat after applying cluster lashes.
- eyelash tweezers – help grab and place the lash clusters underneath natural lashes.
I ordered just a box of clusters because I already had all the essential accessories.

Let’s see whether the DIY eyelash extensions are nice and easy to apply!
The DIY Lash Extensions guarantee easy cluster lashes application which should take 10 minutes tops. The lash wisps case comes with detailed directions for use. I applied volume lashes following the instructions from the manufacturer:
- I applied a layer of the bonder and gave it around 60 seconds so it gets tacky.
- I placed the DIY Lash Extensions under my natural lashes, more or less one millimeter from the eyelash line.
- Using the tweezers, I pressed the clusters, and then applied the sealer.
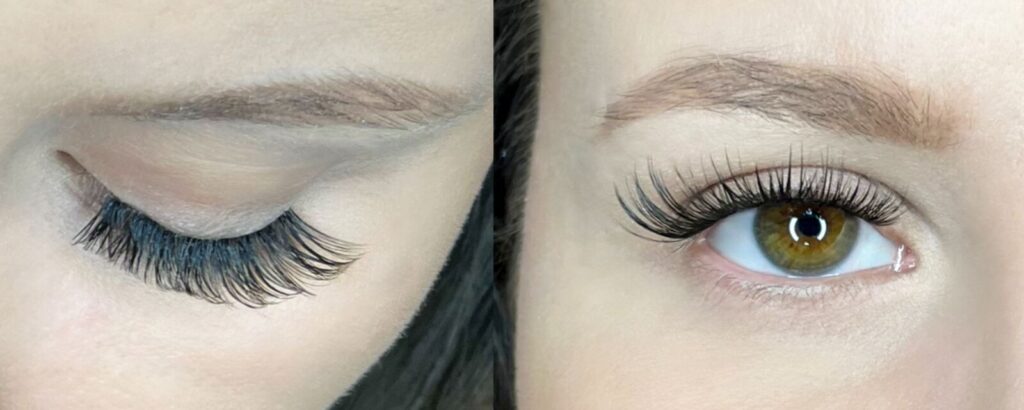
The brand tells the truth – applying cluster lashes took me less than 10 minutes!

Did I wear my DIY Lash Extensions for 5 days?
Now let’s see whether the manufacturer is honest when talking about how long cluster lashes last. The DIY Lash Extensions are to stay put for 5 days. This wasn’t true for me…
I wore the Nanolash eyelash extensions for 8 days! I guess they would last for one or two days, actually. I think I made the lash clusters last longer by following tips for lash extensions aftercare and sleeping on my back.
The remover helped me take off cluster lashes. I was also curious whether they were really just single use. I removed the glue from the strip. You know what? The lash clusters preserved their shape and flexibility! I’m sure I can reuse them.
DIY cluster lash extensions from Nanolash – am I happy with the result?
The premade lash clusters Nanolash are my new go-to lash product. I appreciate their durability, ease of application as well as variety of styles in one box.
One day I did the Hollywood Volume lash style, and a few days later I put on more delicate lashes for work. Nanolash released one of the best cluster lashes I’ve tried so far. I recommend it with a clear conscience!


Leave a Reply